Leathercraft Project Planning Guide
Selecting the appropriate leather is a fundamental step in any leathercraft project. The type of leather you choose can significantly influence the final outcome, both in terms of aesthetics and functionality. Leather comes in various grades, textures, and finishes, each suited for different applications.
For instance, full-grain leather is renowned for its durability and natural beauty, making it an excellent choice for items that will see heavy use, such as bags or belts. On the other hand, suede offers a softer texture and a more casual appearance, which might be ideal for smaller accessories or decorative items. When choosing leather, consider the weight and thickness as well.
Thicker leather is often more robust and can withstand wear and tear, while thinner leather is easier to manipulate and sew. Additionally, the finish of the leather plays a crucial role in its appearance and maintenance. Aniline leather, for example, retains its natural look and feel but may require more care to prevent stains.
In contrast, pigmented leather is more resistant to wear but may lack the unique character of natural hides. Understanding these differences will help you select the right leather that aligns with your project’s requirements.
Key Takeaways
- Choose high-quality, durable leather for your project to ensure longevity and a professional finish
- Consider the design and purpose of your project when selecting the type and color of leather
- Gather essential tools such as cutting tools, needles, and thread, as well as materials like leather conditioner and edge paint
- Take accurate measurements to avoid mistakes and ensure a perfect fit for your project
- Create a realistic timeline for your project to stay organized and on track with your leathercraft goals
Designing Your Project
Once you have chosen the right leather, the next step is to design your project. This phase involves conceptualizing your idea and translating it into a tangible plan. Start by sketching your design on paper or using digital tools to visualize the final product.
Consider the dimensions, shapes, and features you want to incorporate. A well-thought-out design not only enhances the aesthetic appeal but also ensures that the functional aspects of your project are addressed. In addition to aesthetics, think about how your design will be constructed.
This includes considering the stitching patterns, closures, and any additional elements like pockets or embellishments. It’s essential to create a design that is not only visually appealing but also practical and easy to assemble. If you’re new to leathercrafting, it might be helpful to look at existing designs for inspiration or even modify them to suit your style.
Remember that a solid design serves as a roadmap for your project, guiding you through each step of the crafting process.
Gathering Tools and Materials
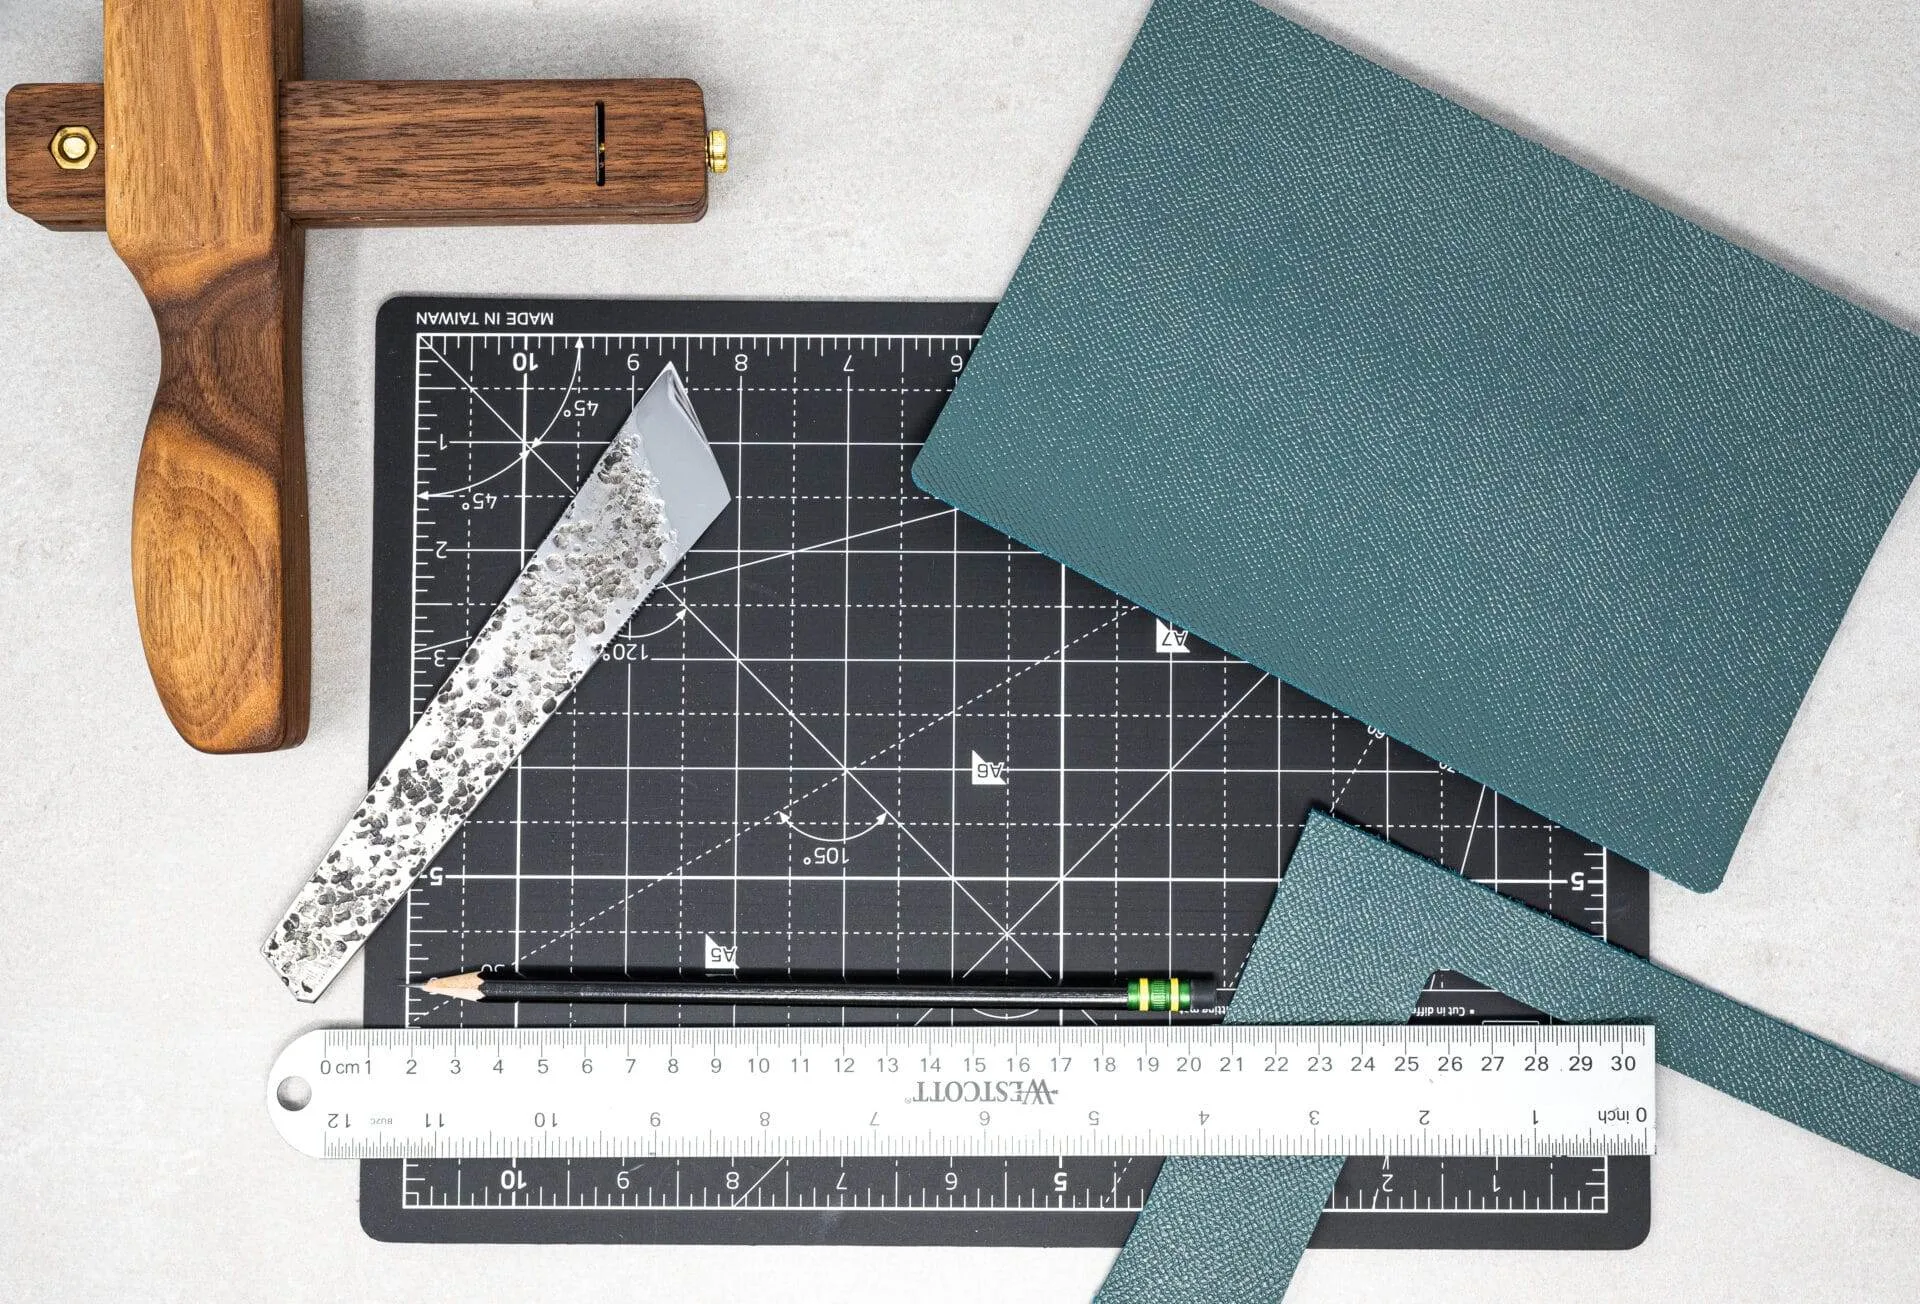
With your design in hand, it’s time to gather the necessary tools and materials for your leathercraft project. The tools you need can vary depending on the complexity of your design but generally include basic items such as a cutting mat, rotary cutter or utility knife, rulers, and scissors. Additionally, specialized tools like leather punches, edge tools, and stitching awls can enhance your crafting experience and improve the quality of your work.
Materials are equally important; aside from the leather itself, you may need thread, rivets, snaps, or other hardware to complete your project. When selecting these materials, ensure they complement your chosen leather in terms of color and style. For instance, if you’re working with a rustic leather finish, opting for antique brass hardware can enhance the overall look.
It’s also wise to invest in high-quality materials to ensure durability and longevity in your finished product. Taking the time to gather everything you need before starting will streamline the crafting process and help avoid interruptions.
Taking Proper Measurements
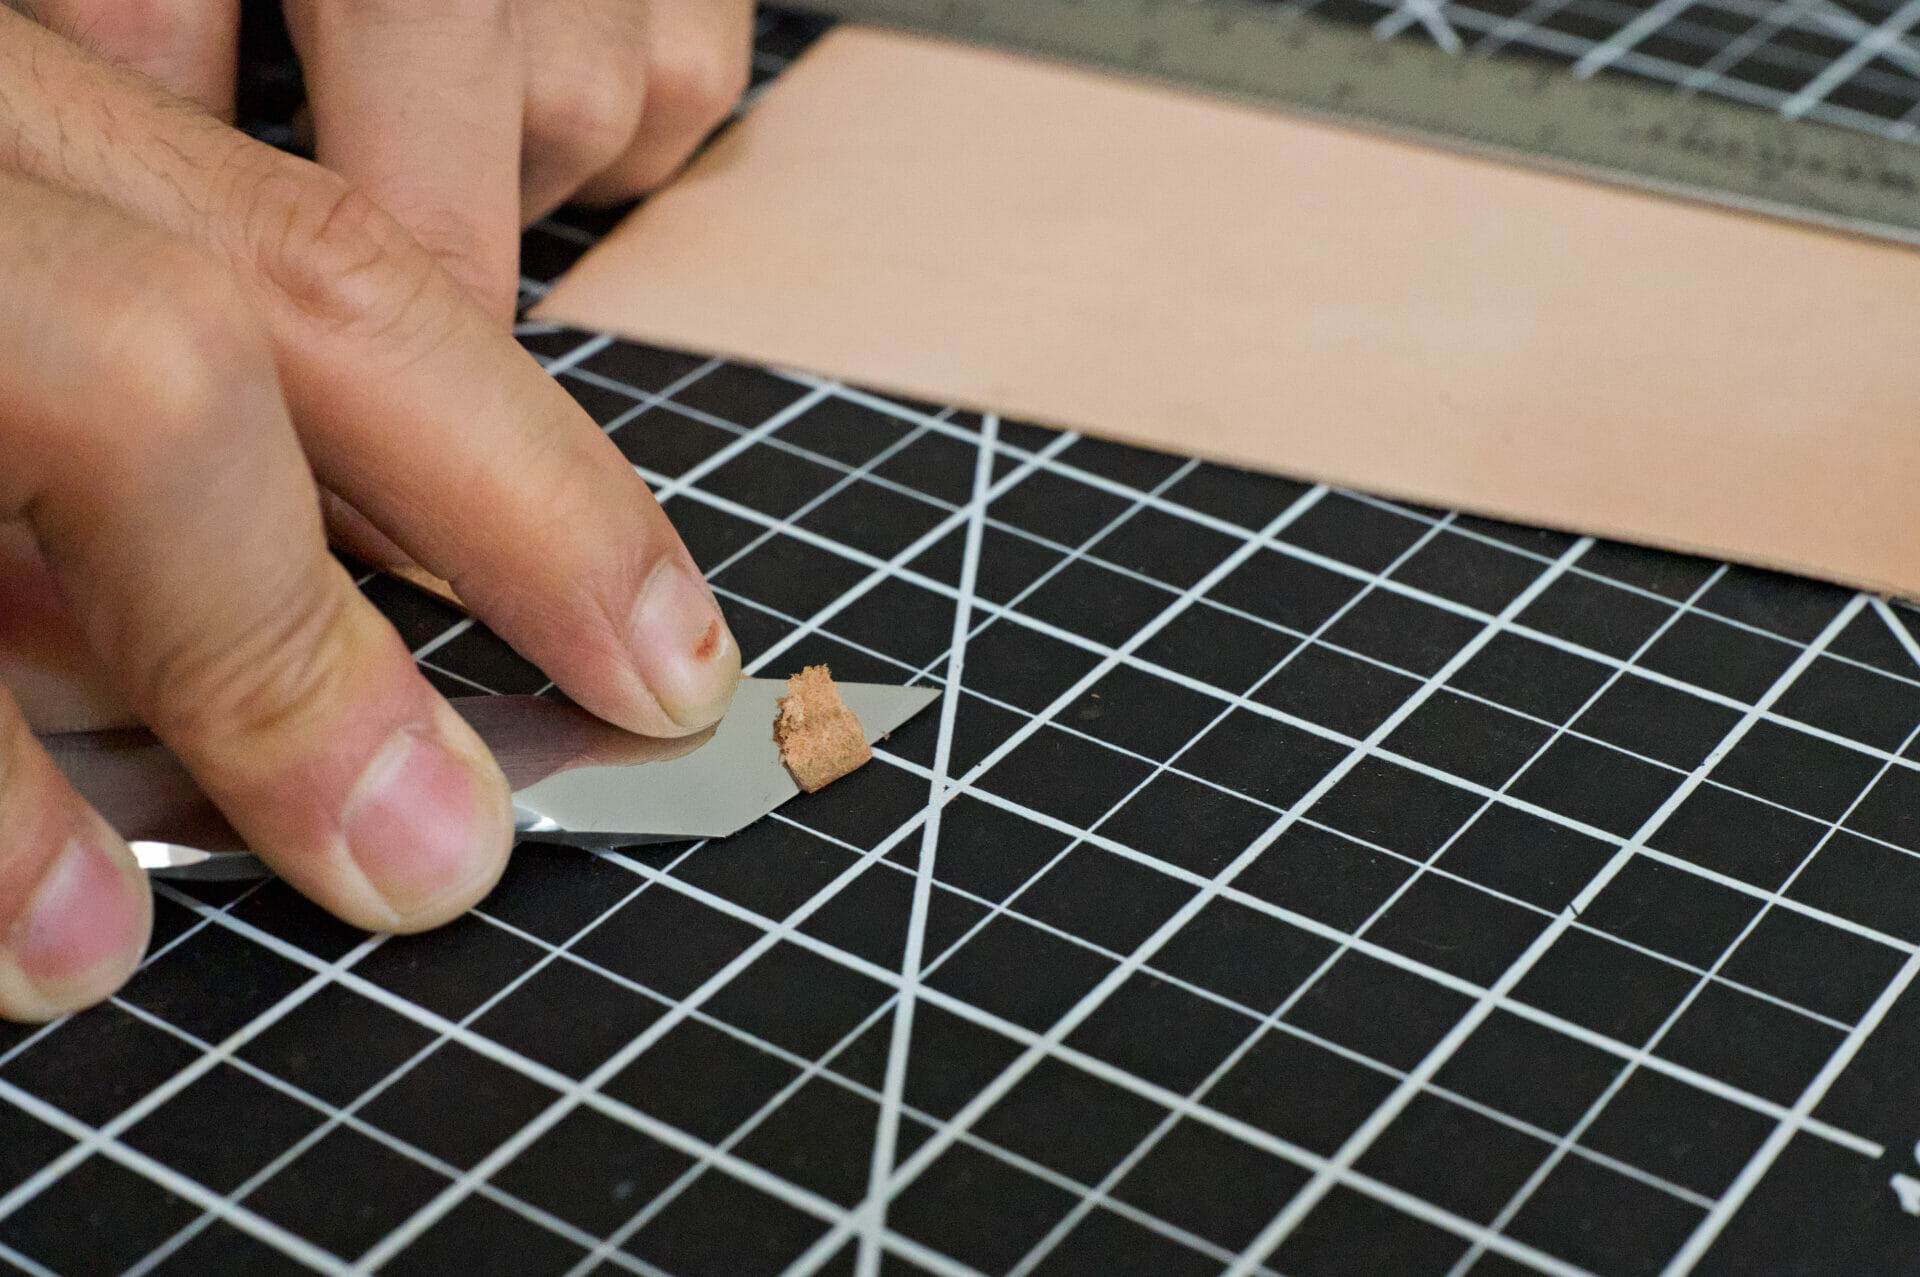
Accurate measurements are crucial in leathercrafting as they directly impact the fit and functionality of your final product. Before cutting any leather pieces, take the time to measure carefully according to your design specifications. Use a reliable measuring tape or ruler to ensure precision, especially when dealing with intricate designs or multiple components that need to align perfectly.
When measuring, consider not only the dimensions of each piece but also any allowances for stitching or finishing edges. It’s often beneficial to create a paper template of your pieces first; this allows you to visualize how they will fit together before committing to cutting the leather. Additionally, double-check your measurements before cutting to avoid costly mistakes.
Taking these precautions will help ensure that your project turns out as intended and fits together seamlessly.
Creating a Project Timeline
Establishing a project timeline is an essential aspect of successful leathercrafting. A timeline helps you organize your tasks and allocate sufficient time for each phase of the project, from preparation to final touches. Start by breaking down your project into manageable steps—this could include gathering materials, cutting pieces, stitching, and finishing touches.
Consider how much time you can realistically dedicate to your project each day or week. Setting deadlines for each phase can help keep you motivated and on track. Additionally, be sure to account for any potential delays or challenges that may arise during the crafting process.
By creating a comprehensive timeline, you’ll have a clear path forward and can approach your project with confidence.
Budgeting for Your Project

Budgeting is an often-overlooked aspect of leathercrafting that can significantly impact your overall experience. Before diving into your project, take some time to estimate the costs associated with materials and tools. This includes not only the leather but also any additional supplies like thread, hardware, and finishing products.
When budgeting, it’s wise to set aside a little extra for unexpected expenses that may arise during the crafting process. For instance, if you find that you need additional tools or materials halfway through your project, having a buffer in your budget can alleviate stress. Additionally, consider investing in high-quality materials upfront; while they may cost more initially, they often lead to better results and greater satisfaction in the long run.
Troubleshooting Common Issues
Even with careful planning and execution, issues can arise during the leathercrafting process. Being prepared for common problems can save you time and frustration. One frequent issue is uneven cuts; if your pieces don’t align properly during assembly, it can lead to an unsatisfactory final product.
To mitigate this risk, always use sharp tools and take your time when cutting. Another common challenge is stitching mistakes—whether it’s uneven tension or misaligned holes—these can detract from the overall appearance of your project. If you encounter stitching issues, don’t hesitate to unpick and redo sections as needed; it’s better to take the time to correct mistakes than to live with them in the finished product.
Familiarizing yourself with these potential pitfalls will help you navigate challenges more effectively and enhance your skills as a leathercrafter.
Finalizing Your Leathercraft Project
As you approach the final stages of your leathercraft project, it’s time to focus on finishing touches that will elevate your work from good to great. This includes trimming any excess threads, smoothing edges, and applying finishes that enhance both appearance and durability. Edge finishing tools can help create clean lines that give your project a professional look.
Additionally, consider how you want to care for your finished piece. Applying a protective finish can help guard against wear and moisture damage over time. Once everything is complete, take a moment to admire your work; reflecting on what you’ve created can be incredibly rewarding.
Whether it’s a simple wallet or an intricate bag, finalizing your project is not just about completing a task—it’s about celebrating your craftsmanship and creativity in leatherwork.
FAQs
What is leathercraft?
Leathercraft is the practice of making items from leather, such as bags, wallets, belts, and other accessories, using various techniques like cutting, sewing, and dyeing.
What is a leathercraft project planning guide?
A leathercraft project planning guide is a comprehensive resource that provides step-by-step instructions and tips for planning and executing leathercraft projects. It includes information on selecting the right leather, tools, and techniques, as well as project ideas and inspiration.
What are the key components of a leathercraft project planning guide?
A leathercraft project planning guide typically includes information on choosing the right leather, selecting appropriate tools and materials, understanding different techniques, planning and designing projects, and troubleshooting common issues.
Why is a leathercraft project planning guide important?
A leathercraft project planning guide is important because it helps beginners and experienced leathercrafters alike to plan and execute their projects effectively, ensuring that they have the right tools, materials, and knowledge to create high-quality leather goods.
Where can I find a leathercraft project planning guide?
Leathercraft project planning guides can be found in books, online resources, and leathercraft workshops. Many leathercraft supply stores also offer guides and tutorials to help customers with their projects.